Sorry, Jim but I just could not stop myself from putting at least one sticker on your jeep. I guess I'm still a kid inside and I love stickers. I promise these will be the only ones I put on your jeep. There are one of these Rubicon Express stickers on each side. OK, well I may put a small American Flag on the spare tire mount in the rear of your ride and that's it, I promise. These manufacturers should not include so many stickers with their parts if they didn't want us Jeep guys to plaster them onto our vehicles.
Monday, February 25, 2008
I just like stickers
Sorry, Jim but I just could not stop myself from putting at least one sticker on your jeep. I guess I'm still a kid inside and I love stickers. I promise these will be the only ones I put on your jeep. There are one of these Rubicon Express stickers on each side. OK, well I may put a small American Flag on the spare tire mount in the rear of your ride and that's it, I promise. These manufacturers should not include so many stickers with their parts if they didn't want us Jeep guys to plaster them onto our vehicles.Front coil spacers are installed.

I added a set of 3/4 inch Rubicon Express coil spacers to the front suspension. After the lift kit was installed the front of the vehicle was sitting just a hair lower in front. I dont like the front rake look that many lifted vehicles have so I picked up a set of spacers for the front and made sure Jims jeep will be perfectly level when you look at it from any angle. This will also compensate for the extra weight of the custom front bumper and winch once they are mounted.
This rear bumper is now bomb proof
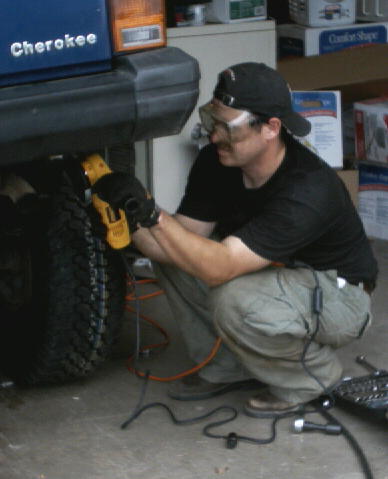
 Alright, after much consideration I have decided to remove the gas tank and get this rear bumper installed the correct way. I will be replacing all the Grade-5 hardware that came with this bumper and mounts to the frame with a higher quality Grade-8 and a newer Grade-9.. I have never heard of Grade-9 hardware before I spoke with my fastener sales guy today. I told him I wanted to replace all the frame mounting hardware with Grade-8 fasteners to ensure that Jim will not have any issues during inspection at a Jeep Jamboree. I was informed that if I wanted to really go above and beyond that I could use a higher strength Grade-9. So I dropped the fuel tank and began to replace all the mounting hardware between the rear bumper and the frame of the vehicle with brand new Grade-8 and Grade-9 fasteners. This will ensure the rear of the vehicle will be able to handle any winch or towing issue Jim will ever encounter without a second thought as to the strength of his bumper. Was this necessary, no. Did it create a lot of work for me, yes. I REFUSE TO PUT MY NAME ON ANYTHING LESS.


Rear suspension linkage is nearly complete
 From this photo you can see the rear pinion is not in alignment with the rear driveshaft. There is about a 5 or 6 degree difference between the two. Jim has ordered a set of Adjustable Upper Control Arms (UCA's) that will address this issue. I will also be installing a Slip Yoke Eliminator Kit (SYE) with a Constant Velocity (CV) driveshaft that measures 4 inches longer. The combination of these parts will ensure this lifted jeep will drive just as well on the highway as it does off-road.
These are some good photos of the nearly completed rear suspension. You can see the Rubicon Express lower control arms, swaybar connectors, shocks and coil springs. All we have left with the rear half is to get the new rear track bar, track bar bracket and UCA's installed and the rear suspension will be complete.

Bent tie rod before replacement install

 Here are two pics of the front tie rod that has a bend in it. This is what was creating the tow in situation with the front tires. When the new HD replacement gets here it will fix this problem.
Monday, February 18, 2008
Front Axle needs alignment
 The front drivers side is sticking out 3 inches.
 The front passenger side is tucked inside the fenders. The rear tires stick out 1 - 1/4 inches on each side from the fenders.
I will be purchasing a new front Track bar and front tie rod this week since the front axle is pushed 3 inches to the drivers side as a result of the lift kit. The result is the funny look as well as the sway bar disconnects are crooked. The tie rod will be also be replaced since it is slightly bent and creating a tow-in situation. Althought the jeep is starting to look finished there are still a bunch of tiny details that need to be addressed. I still need to rebuild the transfer case and install the rear CV driveshaft. The rear track bar needs a little custom fab work to get it correctly installed. I need to drill out and install about 50 rivits for the rock-sliders on the sides. The rear bumper is still not on all the way yet. The gas tank needs to be re-installed. The front bumper is still not here yet and that will need to be installed along with the winch. I still need to tighten the front and rear control arms after the suspension settles in. If the rear driveshaft is not in alignment with the rear differential then a rear cam bolt kit will need to be intalled. I still need to install the stainless steel brake lines as well as the transfer-case drop kit, front track bar, rear track bar and front tie-rod. Oops I forgot to mention the front and rear differential covers. Then I need to perform a shakedown and address any gremlins that pop up. I love this stuff.


Tuesday, February 12, 2008
ARB rock rails start to go on the Jeep
 This photo is just a teaser of what the wrangler will look like once it's finished. I started to disconnect the old suspension components today. I thought I would roll one of the tires in front of the Jeep to get a feel for what the end result will look like.
 I got one side of the ARB rock slider rails put on today. I still need to drill about 20 holes and drive 20 rivits before this side is done but you can see what it will look like when completed.
 I put the Jeep on four jackstands and started to bolt on some more stuff today. Lookin good.
Sunday, February 10, 2008
Tires, wheels, fenders and rear bumper are mounted


The tires are mounted on the wheels. The rear bumper is mounted (almost). I still need to do a little more to get the rear bumper on. There are some bolts that need to be inserted behind the gas tank, so i need to drop the tank and get those four bolts in place. I picked up a 7 inch drop down hitch for towing a trailer (which will be needed once the lift is on) I put the front fenders on but I am waiting to install the rear ones until I get the ARB rock sliders in place on the sides. It is coming together very nicely but a little slower than I would like. We still dont have the front bumper yet but I am expecting to get it any day now. I will pick up some D-ring shackles and some coded lug nuts tomorrow on the way home from work.
Saturday, February 2, 2008
Beginning of Warn rear bumper being mounted
 This Warn rear bumper is very nice but takes one big ass drill and a little custom fitting to get it on there. I had to stop when my neighbors went home because this sucker is very heavy and I needed help to move it on and off to "fit" the holes. It also requires the fuel tank skid to be removed as well as some manuvering to get the tire carrier mounted since the tail gate hinges are in the way. Turns out this bumper is a bigger job than I had anticipated. I did not get as much done today as I would have liked but it was still very productive and I am proud to put my name on the quality of the installation done today.
The poison spider custom flares are mounted


The poison spider custom rocker corners are being installed. The dirvers side was pretty easy but the passenger side was a bear because the fuel pump and related components are stuffed in that corner and make it very difficult to access the back of the screws.
Disassembly begins


The next step after returning from discount tires was to disconnect the battery and start removing the fender flares. It took a little longer than expected since the rear flares have several plastic "nuts" on the backside that just kept spinning. The old parts are starting to stack up on me.
Tires are mounted!

 First thing I did this morning was take the tires and wheels over to discount tires and have them install valve stems and mount the tires on the wheels and then balance all five. It took them about 1 hour so I drove to pet smart and picked up some food for the cats.
Subscribe to:
Comments (Atom)